Showing posts with label RHCSA Objectives. Show all posts
Pawan Sharma | December 11, 2012 | | Be the first to comment!

Package Management in RHEL6: RPM

One of the major duties of a system administrator is to manage applications/software on the server. System administrator needs to know how to add and remove or get information about packages. In this post we will learn RPM (Redhat Package Manager) commands to manage software on Redhat Enterprise Linux 6. To pass the RHCSA certification exam this RHCSA objective is must. In this post we will learn:

  • What is RPM PACKAGE?
  • How to install .rpm package file in Redhat Enterprise Linux 6(RHEL 6)?
  • How to remove/erase rpm package in RHEL 6?
  • How to query about a package in RHEL 6?
  • How to check signature of rpm package?

In RHEL 6 applications/software comes in the form of package. In general package is a container of files. A package includes binary scripts, configuration files and documentation files. A RPM package name usually includes version and architecture. For example openssh-5.3p1-70.el6.x86_64 in this openssh is package name 5.3p1 is version build 70, x86_64 is architecture.

In Redhat Enterprise Linux 6 software packages have their dependent packages. RPM package installation won’t work if there are dependencies. To install a .rpm package use below mentioned command:

# rpm -i package_name
# rpm -U package_name

The rpm -i option install the package if it is not already installed. The rpm -U option upgrades the package if it is installed or install if already not installed. I will suggest to use -vh option while install/upgrade package this will add verbose mode and hash mark to help monitor the installation process. Also at the time of installation, if some files are to be overwrite, it automatically takes a backup of the original file as .rpmsave extension.

NOTE: Before upgrading any package, take backup of all configuration files related to that package.


EXAMPLE:

In this example we will install gcc package.

# rpm -ivh gcc-4.4.6-3.el6.x86_64.rpm

warning: gcc-4.4.6-3.el6.x86_64.rpm: Header V3 RSA/SHA256 Signature, key ID fd431d51: NOKEY
error: Failed dependencies:
        cloog-ppl >= 0.15 is needed by gcc-4.4.6-3.el6.x86_64
        cpp = 4.4.6-3.el6 is needed by gcc-4.4.6-3.el6.x86_64
        glibc-devel >= 2.2.90-12 is needed by gcc-4.4.6-3.el6.x86_64

In the above example we can see that there is an error while installing “gcc-4.4.5-6.el6.x86_64.rpm” package and installation got failed. This so due to dependencies, gcc require cpp and libgomp package to install. So we have to install cpp, clog-ppl and glibc-devel package first.

# rpm -ivh cpp-4.4.6-3.el6.x86_64.rpm

warning: cpp-4.4.6-3.el6.x86_64.rpm: Header V3 RSA/SHA256 Signature, key ID fd431d51: NOKEY
error: Failed dependencies:
        libmpfr.so.1()(64bit) is needed by cpp-4.4.6-3.el6.x86_64

Again package “cpp-4.4.6-3.el6.x86_64.rpm” failed due to dependencies error. In Linux this is called “dependency hell”. To overcome this problem Redhat introduced YUM (Yellow Dog Modifier) which will find and resolve all dependency to install package. We will discuss YUM in some other post.

If a package don’t require any dependency or all dependencies are already installed the package will install.

# rpm -ivh squid-3.1.10-1.el6_1.1.x86_64.rpm

warning: squid-3.1.10-1.el6_1.1.x86_64.rpm: Header V3 RSA/SHA256 Signature, key ID fd431d51: NOKEY
Preparing...             ########################################### [100%]
1:squid                  ########################################### [100%]

To remove a package use rpm -e command. Here e stands for erase.

# rpm -e squid

To check .rpm package signature user --checksig option:

# rpm --checksig firefox-3.6.24-3.el6_1.x86_64.rpm

firefox-3.6.24-3.el6_1.x86_64.rpm: RSA sha1 ((MD5) PGP) md5 NOT OK (MISSING KEYS: (MD5) PGP#fd431d51)

SOME MORE RPM COMMAND

  • rpm -q package_name: This will query if package is installed or not.

# rpm -q firefox
firefox-3.6.24-3.el6_1.x86_64

# rpm -q squid
package squid is not installed

  • rpm -qa: List all installed packages.

# rpm -qa

postfix-2.6.6-2.2.el6_1.x86_64
rpcbind-0.2.0-8.el6.x86_64
hpijs-3.10.9-3.el6.x86_64
system-config-printer-libs-1.1.16-22.el6.x86_64
filesystem-2.4.30-3.el6.x86_64
mdadm-3.2.2-9.el6.x86_64
…..
………..

  • rpm -ql package_name: List all files from package.
  • rpm -qc package_name: List only configuration files from package.
  • rpm -qf /path/filename: List packages associated with file.
  • rpm -qi package_name: List basic information about the package.

In the next post we will learn more about package management in RHEL 6 using YUM.

If you have any question or query please post comments.


Pawan Sharma | September 8, 2012 | | 20 Comments so far

Set Access Control List (ACL) in RHEL 6

In this post we will discuss about Access Control List in Redhat Enterprise Linux 6 to give permissions to different users and groups on file or directory. As discussed in the previous posts file/directory permissions can be set for the owner, group and other users. But what, if in a case, when we have to give different permissions to different users on the same file/directory. In such situation we can set ACL on file/directory to give different permissions to different users.

Before applying ACLs, you have to mount the partition, in which you want to set ACL, with “acl” option. We can mount the partition using mount command or can add “acl” option in /etc/fstab for that partition.

[root@PawanS1 ~]# mount -o remount,acl /appl


As shown in above picture we have added option “acl” in /etc/fstab file.
We can set ACLs on per user and per group basis, also we can modify acl mask.
To set ACL on a file or directory use command “setfacl” with -m option to add or modify current ACLs.

[root@PawanS1 ~]# setfacl -m acl_rule files


ACL RULES:

u:uid:permission :- This rule will set ACL for user with mentioned uid or user name of valid user.
g:gid:permission :- This rule will set ACL for group with mentioned gid or grou pname of valid group.
m:permission :- This will update the umask of ACL.

Note: “permission” mentioned above in rule can be combination of read(r), write(w) and execute(x).

Let’s take some examples of ACL:

Give read and execute permission to user usaid on file test.txt

[root@PawanS1 ~]# setfacl -m u:usaid:r-x test.txt

Give read, write and execute permissions to group admin on directory /servers recursively.

[root@PawanS1 ~]# setfacl -Rm g:admin:rwx /servers


Note: If possible use uid/gid to add/change acl, as username starting with a numeric character will have problem while adding access control list.

Some of the options used with setfacl command.

-b : Remove all extended ACL entries.
-d : Grant default ACL.
-m : Modify and Add ACLs.
-R : Apply ACL recursively on subdirectories.
-x : Remove particular ACL entry.

Remove all permissions of user siddharth on file test.txt

[root@PawanS1 ~]# setfacl -x u:siddharth /servers

A file on which ACL is set have “+” in last of permission column in “ls -l” output.

[root@PawanS1 ~]# ls -l shared_file.txt
-rw-rwxr--+ 1 root root 43 Aug 29 12:20 shared_file.txt

To view the current ACLs on a file or directory we can use “getfacl” command. Below example shows acl applied on a file named shared_file.txt

[root@PawanS1 ~]# getfacl shared_file.txt

# file: shared_file.txt
# owner: root
# group: root
user::rw-
user:siddharth:r--
user:usaid:rw-
user:ramswaroop:r-x
group::r--
mask::rwx
other::r--

In the above example you can see that owner and group of the file is root and user “siddharth” have read access, user “usaid” have read and write permission and user “ramswaroop” have read and execute permission on the file shared_file.txt.

For any queries please post comments. 

Pawan Sharma | May 22, 2012 | | Be the first to comment!

Understanding: /etc/shadow (User Account Management)

RHCSA exam focus on basic system administration, and questions asked in RHCSA are similar situations which you will face in real environment.
 /etc/shadow is not commonly used file, but is very important as far as User Administration and RHCSA is concern.
 /etc/shadow contains password related information for user and groups on the system. This file stores actual password in encrypted format for user's account with additional properties related to user password. Only root user can read shadow file, other users can not read this file.

There are 9 fields in /etc/shadow file seperated by ':' i.e. IFS (Internal Field Seperator) ,and they are explaeind as below -:An example entry of /etc/shadow is given below:

pawan:$1$J6/rsxw3$TEcDpPsW0gx9035DFNlUU/:15162:0:99999:7:::
                                                                                       
Each entry in /etc/shadow contains 9 fields which are separated by ":".
/etc/shadow
1. Username: It is used when user log-in. It should be between 1 to 32 character.

2. Password: It is a user's encrypted password. The password should be minimum of 6 to 8 characters long including special characters/digits.
3. Days since Unix epoch password was changed (Jan 1 1970). This can also be interpreted as the field , if chaged to 0 , the user password is immdeatly expired . When the user logs in the next time , he is forced to change his pasword ( root enforced ).

4. Minimum: Days left before password may be changed. This can also be interpreted as number of days after which the password is allowed to be changed.This is to stop user from changing his password very frequently . Normally is given 0 , so that user can change his password the number of times he desires.

5. Maximum: days after which password must be changed. This field is used to put the restriction on the maximum no. of days that a password can be used by the user.After the no. specified in the file against this file expires , he/she is forced to change their password.

6. Warn: The days before password is to expire, that user is warned that his/her password must be changed.

7. Inactive(Password Grace Field): The days after password expires, that account is disabled. This field is used as warning period alloted to user after his account's password is expired as specified by the 5th and 6th field. After this period the user's account is disabled and can only be re-enabled by the root user.
8. This field is used as an emergency disable field by the root user. If 0 is given in this field , the user account will be disabled immediately and he cannot login till the time root does not remove this restriction.
 
9. This field is reserved for future use.
5th , 6th and 7th field combined together can be used by the root to make a policy to make sure that passowrd is changed after a specified no of days , keeping in account grace and warning field. If the user is not able to comply for any perticular reason,his account is blocked.

Using this file you can manage password properties.
Please click on facebook like button if you like the post.

    Pawan Sharma | May 21, 2012 | | Be the first to comment!

    Understanding: /etc/passwd (User Account Management)

         In this post we will discuss one of the most important file in Redhat Enterprise Linux (RHEL), which is /etc/passwd. This file is very important because this serves as a default database of user on the system. Using /etc/passwd we can add users, modify user settings, etc from command line.
         For user administration part of the RHCSA Exam this is the most important file. Using /etc/passwd you can do the exam tasks and also check the results to confirm your completed tasks related to users.

    An example entry of /etc/passwd is given below:

    pawan:x:501:501:Pawan Sharma:/home/pawan:/bin/bash

    Each entry in /etc/passwd file contains 7 fields.

    1. Username: It is used when user log-in. It should be between 1 to 32 character.

    2. Password: An 'x' character indicates that encrypted password is stored in /etc/shadow file. The 'x' refers and matches password value from /etc/shadow file. If we put * inplace of x then user can't login. If we keep second field blank then user can login without password.

    3. User ID (UID): Each user must be assigned a User ID (UID). UID=0 is reserved for root user and UID 1 to 99 are reserved for other predefined accounts. It is a unique identity number for every user on the system.

    4. Group ID (GID): Whenever a user is created a primary group is also created for a user. Every user have its own primary group but it can also have supplementary groups.


    5. GECOS: This is optional and only used for informational purpose. Usually it contains the fill name of the user. You can say it as a comment field.

    6. Home Directory: It represents  the absolute path to the user's home directory. If this directory does not exist the '/' directory becomes the users home directory.

    7. Shell: The absolute path of command or shell (/bin/bash). Typically this field contain information about user's default shell.
    This file is one of the most important file as far as RHCSA is concerned. So do a lot of experiments on this file, but before making any changes to this file take a backup of this file.

    If you have any questions regarding user administration or /etc/passwd please ask me. I will try to answer.....

      Pawan Sharma | | | Be the first to comment!

      User Administration in Linux

      User administration is the most important part of Linux system administration. It is one of the most important objective of RHCSA and RHCE certification exam. In Linux Users and Groups can be administered using user/group administration GUI tool, also users can be created through command line as well in Redhat Enterprise Linux. But I will suggest you to use command line user administration commands as much as possible because in production environment GUI won’t be provided. Many people who are learning Linux don’t know all features of user administration commands and related files. In the next few posts we will discuss all about the user administration and features.

      There are three types of users in Linux.

      1. Superuser: At the time of Linux installation it is create. Root user has right to make other users & his “userid” & “groupid” is zero in “/etc/passwd” file.
      2. Systemuser: These users create by System. They can't login because their shell ‘sbin/noloin’ is default in seventh field in `/etc/passwd' file.
      3. Normaluser: These users create by superuser.

      To add a user from command line we need to use a command useradd/adduser:
      user and group in Red hat enterprice linuxFor example “useradd pawan”.

      adduser is not a binary but it is a symlink to the old unix command useradd which is present in /usr/sbin directory and this command can only be executed by root. In total, 69 things happen when a command useradd is given, we will discuss all.

      When useradd command executed, the information of useradd store in two main configuration files ‘passwd’ & ‘group’ these are related with other configuration files.

      Configuration files

      |----/etc/passwd
      |
      |----/etc/group
      |
      |----/etc/shadow
      |
      |----/etc/gshadow
      |
      |----/etc/login.defs
      |
      |----/etc/default/useradd
      |
      |----/etc/skel

      We will discuss about all these files in details in next post.

      Pawan Sharma | October 19, 2011 | | Be the first to comment!

      Logical Volume Manager in RHEL 6: Part1

      Logical Volume Manager also known as LVM is one of the most important topic, not only for the RHCSA exam preparation but also for the real environment System Administration. In production environment the disk partitioning is mostly based on LVM because of facilities and ease provided by Linux Logical Volume Manager. LVM provide facility to create partitions flexibly. For example using LVM we can make a volume group using a chunk of hard-disks, and from that volume we can create partitions as required. LVM gives System Administrator, power to extend or reduce the partitions online, means we can extend a logical volume while the data on it is being accessed by the users, without corruption of data.

      It is important to understand the basic concept of LVM. There are mainly three steps(points) to create LVM:
      • Physical Volume:- Actual hard-disk or a partition of disk.
      • Volume Group :- Group of one or more than one physical Partition(s).
      • Logical Volume :- Partition created from Volume Group.
      LVM in RHEL 6
       In the above example there are three disks (can also use partitions of disk) made as Physical Volume(PV), lets say size of each Physical Volume be 20 GB. From these three Physical volumes we create a Volume Group(VG), so the size of that Volume Group is 20 x 3 = 60 GB. From that Volume Group we can create multiple Logical Volumes (partitions) of different sizes or a single partition of 60 GB. We can use the whole volume group at a time, or can use create partitions when required. 


      Lets take a simple example: We have created a Volume Group named VGDATA of size 60 GB using three 20 GB Physical Volumes. From Volume Group "VGDATA" we created two Logical Volumes "lvdata1" and "lvdata2" each of size 30 GB and mounted them on /data1 and /data2 respectively. After a period of time we feel that directory /data2 is getting full and need more space, we can do that by adding a new hard-disk of size 25 GB and making it a Physical Volume. Now we can extend the Volume Group VGDATA by adding the new Physical Volume to it. So now size of VGDATA becomes 85 GB. Now we can extend the Logical Volume "lvdata2" to appropriate size.

      This is a general overview of Redhat Enterprise Linux Logical Volume Manager (LVM). In the next post we will learn commands and process to create LVMs'.


      For any questions or quires please comment.
      Pawan Sharma | September 12, 2011 | | Be the first to comment!

      Creating and Deleting Partitions in RHEL 6

      Partitioning is a very important concept in Linux. If you have your concepts clear,  related to partitioning in Linux, it will be very helpful when you became a Linux System Administrator.

      There is a new partitioning tool RHEL6 cfdisk, but we will see the traditional and most popular partitioning tool "fdisk". To use fdisk first you have to login as root. if you are a regular user and know root password, you can switch to root account using "su" command.
      • To see your current disk and partitions run: fdisk -l

      In the above image you can see that I have two hard disks. The first one is /dev/sda and the other one is /dev/sdb. In the above image you can see that the HDD /dev/sda is of size 16 GB and having two partitions /dev/sda1, which is created at the time of installation as /boot, and /dev/sda2, which is a Linux Logical Volume Manager(LVM). The second HDD is /dev/sdb which is newly installed HDD of size 2 GB and does not contain any valid partition table as you can see in the image.

      In this post we will create the physical partitions and mount them on particular directories.
      • To create a partition of 1 GB form /dev/sdb type :fdisk /dev/sdb, and press m to see menue.
      •  Press n to create new partition, p to create primary partition and e to create extended(always create first partition as primary), make partition 1, select first cylinder as default and on next line type +size of partition to be created,ex +1G.


      • Now press p to print current partition table and press w to save partition table. and on command prompt type partprobe to update current partition table and run fdisk -l /dev/sdb.

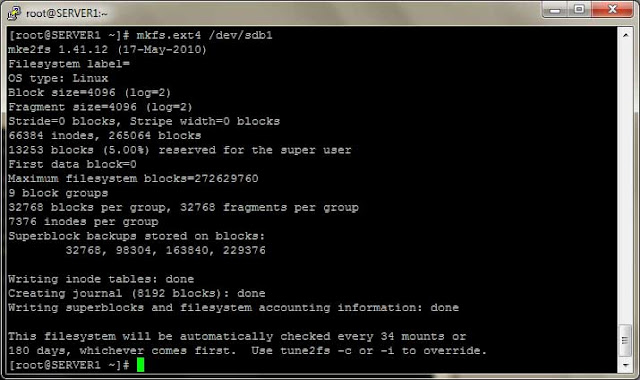
      •  Now format this partition with command : mkfs.ext4 /dev/sdb1. Then create a directory /mydata, and mount /dev/sdb1 on /mydata using command : mount /dev/sdb1 /mydata.


      • Make entry in /etc/fstab to make mounting persisting, means mount /mydata every time when server restart.
      In next post we will learn how to create partition using Linux Logical Volume Manager(LVM) .
      Please comment if you have any doubts.


      Pawan Sharma | September 7, 2011 | | Be the first to comment!

      RHEL 6 File-System


           In this post we will discuss about the file system in RHEL 6. In Linux operating system there is a pre-defined location to store different files. 


           The Linux file system can be defined as the method of storing and organizing files in a form that we can understand easily. In Linux operating system everything is a file. To manage all these files Linux have a tree like directory structure. File system is a method of storing and organizing arbitrary collection of data in a form that is human readable.


      File system structure of RHEL 6:


        • / :- Root directory, which contains all other directories.
        • /bin :- Contains commands that may be used by both system administrator and by users, but which are require when no other file-systems are mounted. 
        • /boot :- This directory contains everything which required for the boot process, like kernel, GRUB, Initrd, etc.
        • /dev :- Contains device files.
        • /etc :- Contains configuration files.
        • /home :- Contains users’ home directories.
        • /lib :- Essential shared libraries and kernel modules.
        • /media :- Mount point for removable media.
        • /mnt :- Mount point for temporary mounted file-system.
        • /opt :- Contains add-on/optional packages.
        • /root :- Root user’s home directory.
        • /sbin :- Contains system binaries.
        • /tmp :- Contains temporary files.
        • /var :- Contains variable data files.
        • /proc :- Contains kernel and process information.
        Pawan Sharma | June 10, 2011 | | Be the first to comment!

        Group Administration

        In the last post I described about the the user administration. After user administration another task is to manage groups. 
        To see the present groups in your system you can type groups command. The /etc/group maintains the group membership information. You create groups and add users to a group using both GUI tool and Command line, but I will suggest you to use command line because it is fast and easy. Once you have been familiar with the command line you will enjoy using it the most.

        To create new group you can edit /etc/group file or you can run the following command:
        • groupadd group_name : this will add a group named group_name in /etc/group.
        • groupdel group_name : this will delete a group named group_name in /etc/group.
        • groupmod : modifies group members.
        • chgrp : to change group permissions.
        GROUP ADMINISTRATION
         To add users named donna to a group named sales you can run the following command:
        • usermod -G sales donna : this command will add user donna to the group sales.
        OR
        • You can add user donna directly to the /etc/group 
          • sales:x:503:donna

        To add a user to a group at the time of creation of user, you can type the following command:
        • useradd -G sales mike : this command will make a user mike and add it to the sales group.
        You can also use Graphical User Interface for user and group administration.
        To open the USER and GROUP GUI run system-config-users at the command line or
        • Go to System-->Administration-->Users and Groups.
        You can do a lot with users and groups like provide special privileges to specific users or groups and also can do the group collaboration. We will discuss these topics in the next post.
        ..................................................................................................................................................................
        Pawan Sharma | June 8, 2011 | | Be the first to comment!

        Basic Linux Commands

        To start-up with the Linux first someone needs to know about the basic Linux commands. These commands are common in all Linux distributions. If you know these basic Linux commands, it will be easy for you to get further in in your goal to achieve a RedHat Certification.

        To be a system administrator you need to know how to manage the server using command line, because you will hardly allowed to use GUI. Because most of the system administration tasks are managed remotely using the secure shell also known as SSH. So use the command line as much as possible.

        Basic Linux Commands and there explanation is given below:

        • uname :- this command returns the name of Operatng System.
        • uname -a :- using :- "a" option with uname command, you will get the following information:
          • Operating System : Linux.
          • Fully Qualified Domain Name.
          • Kernel Version.
          • Date and time that the kernel was compiled.
        • tty :- reveals the current terminal.
        • echo :- prints to the screen.
        • set :- prints and optionally sets shell variables.
        • clear :- clears the screen / terminal.
        • reset :- resets the screen buffer
        • pwd :- prints the path of working directory.
        • whoami :- reveals the current logged-in user.
        • which programe_name :- reveals the path of the program / command.
        • history :- reveals your command history.
        • cd :- changes directory to desired directory:
          • cd with no option will changes to the home directory.
          • cd ~ will also change to the home directory.
          • cd /  will change to the root (/) directory
          • COMMAND LINE
          • cd ..  will change one level up in the directory tree.
        • ls  :- lists files and directories.
          • ls / lists the contents of / (root) directory.
          • ls -l will lists in long format. This command shows properties of files and directories.
          • ls -a will list all files including hidden files which starts with a period (.).
          • ls -ld will show properties of the directory.
        • cat  :- catinates files. Create files and also show contents of files.
          • cat 123.txt dumps the contents of the file 123.txt.
          • cat > xyz creats new file xyz. You can write to the file and save using ctrl+d.

        • mkdir  :- creates a new directory.
        • cp :- copies files
        • mv :- moves and rename files.
        • rm :- remove files.
        • touch :- create a blank file.
        • stat :-  reveals the statistics of a file.
        • find :- finds files using search pattern.
          • find / -name filename will search the file named filename in the / directory/
        • alias :- return/set aliases for command.
        • more/less :- display one page at a time.
        • head :- display opening lines of a file.
        • tail :- display cloasing lines of a file.
        • wc :- counts words and optionally lines and characters in a file.
        • grep :- search for text in a file.
        • su :- to switch user.
        • man command_name  :- open manual for that command.
         These are the the basic Linux commands. But there are a lot more commands, you will learn command while using it, it will take time but more you work in linux more you learn.

        NOTE : There are many options which can be used with these commands or other commands. Always view man pages of command to find different options. I think using man command is very good habit.

        Please comment on the post. You can also write questions and I would love to answer your questions and help you.
        Pawan Sharma | March 29, 2011 | | 2 Comments so far

        Booting in to RUNLEVEL of your choice


        One key skill is to understanding how to boot system in to different runlevels. Everyone, who wants to attempt the Red Hat Certified System Administrator exam, should know how to boot into different runlevels during the boot process. This is explicitly described as an RHCSA requirement. In this section I will explain you how to boot system in to different runlevel for troubleshooting and maintenance. In this section you will use GRUB menu to boot in to different runlevels. 

        Here are simple steps which explains HOW TO BOOT IN TO RUNLEVEL OF YOUR CHOICE:

        • When you boot the system BIOS looks for the MBR and finds GRUB to edit the directives in GRUB menu, press any key before the following message expires (normally in 5 seconds):
        “Press any key to enter menu”

        You will see menu similar to figure given below, from where you can modify how GRUB boots into Linux.
        GRUB BOOT menu of RHEL 6

        •  If the menu is password protected, you will have to press p before entering the password.
        •  Then press a to access the kernel command line.
        • At the end of kernel command line, type a space followed by the runlevel of your choice. For example 1 or single, 2,3, and 5.
        •  And press b to boot. You will now boot in to the runlevel you specified in above step.

        Reboot your system and you can see that now the system boots in its default runlevel, because editing kernel entries from GRUB menu does not make changes in /etc/inittab file which have an entry for default runlevel. To make your changes permanently you have to edit the /etc/inittab file.

        The main purpose for booting system into different runlevel is to correct serious problems in the system. And to correct we use the single-user mode or runlevel 1.

        At the GRUB menu you can use following commands:

                  Command           Description
        •   b                        Boot the current listed Operating System
        •  d                        Delete the current line
        •  e                         Edit the current line
        • o                         Create empty line underneath the current line
        • O                        Create an empty line above the current line
        •  
        These options/commands can be used at boot menu to booting in to different runlevel.
        Pawan Sharma | March 28, 2011 | | Be the first to comment!

        Runlevels in RHEL 6


                  In this post I will explain you about different RUNLEVELS in RHEL 6. All Linux services are organized by runlevels. Runlevels can be used to halt or reboot the system, some runlevels can boot Linux with or without networking services. There are six runlevels and each runlevel executes a specified set of scripts. Runlevel and description of each runlevel is given below:


                        Runlevel              Description
        • ·         0                              Halt
        • ·         1                              Single-user mode, for maintenance and repairs
        • ·         2                              Multiuser, with some networking services
        • ·         3                              Multiuser, with networking
        • ·         4                              Unused
        • ·         5                              X11 console, Defaults to a GUI desktop with networking
        • ·         6                              Reboot

                  All of these runlevels are defined in /etc/inittab file which is first process and which decides the default runlevel and to launch scripts for a particular runlevel. The functionality of each runlevel is given below:

        • ·         Runlevel 0 will halt the system, never sets this runlevel your default runlevel.
        • ·         Runlevel 1, also known as single-user mode, only one user is allowed to connect to Linux system.    This runlevel is used for system maintenance, repairs, backups and restores.
        • ·         Runlevel 2 is a multiuser with some networking. This runlevel is used for configuring the system  performance.
        • ·         Runlevel 3 is a also multiuser environment with all the networking services. This runlevel or console is used by the system administrator or other general users. This is a text based console
        • ·         Runlevel 4 is Unused. One can edit this runlevel to make it customized to use.
        • ·         Runlevel 5 is a X11 console. This runlevel defaults to a GUI login screen. Logins bring the user to a Graphical User Interface desktop with all networking services.
        • ·         Runlevel 6 will reboot the system. Never set the initdefault (default runlevel) to this value. This will enter a continuous reboot cycle.


                  Each runlevel have some series of scripts associated with it. All scripts are collectively stored in /etc/rc.d/init.d directory and all runlevels also have their own directory which contains some start and stop scripts. The scripts associated with each runlevel can be found in /etc/rc.d directory:

                  rc0.d
                  rc1.d
                  rc2.d
                  rc3.d
                  rc4.d
                  rc5.d
                  rc6.d

                  In someone’s Linux system the default runlevel is 5, init process will in /etc/rc.d/rc5.d and run each “kill” and ”start” script. The kill script is a file or symbolic link to the file with a name that begins with “K”. Likewise, start script is a file or symbolic link to the file with a name that begins with “S”.


        Pawan Sharma | March 27, 2011 | | Be the first to comment!

        GRUB menu of RHEL 6


                 In my previous post I explain the BOOT PROCESS of RHEL 6. In this post I will explain you the GRUB boot loader and files associated with the GRand Unified Boot loader.
                 The Standard Boot loader associated with Red Hat Enterprise Linux is GRUB, the GRand Unified Boot Loader. As suggested by the Red Hat exam requirements, for RHCSA exam, you need to know how to use Grub menu to boot in to different runlevels, and diagnose and correct boot failures arising from boot loader errors.

                 When you start your computer, your BIOS look for the /boot directory and finds the GRUB menu, which will look similar to figure below:

        RHEL 6 GRUB Menu


        To understand the GRUB, the best place is to start is form GRUB configuration file.
        You can find grub configuration file ‘grub.conf’ in /boot/grub/ folder and also you can find a hard link of ‘grub.conf’ file in /etc/ directory. The contents of a GRUB configuration file in RHEL 6 are given below:

        # grub.conf generated by anaconda
        #
        # Note that you do not have to rerun grub after making changes to this file
        # NOTICE:  You have a /boot partition.  This means that
        #          all kernel and initrd paths are relative to /boot/, eg.
        #          root (hd0,1)
        #          kernel /vmlinuz-version ro root=/dev/sdb3
        #          initrd /initrd-[generic-]version.img
        #boot=/dev/sdb
        default=0
        timeout=5
        splashimage=(hd0,1)/grub/splash.xpm.gz
        hiddenmenu
        title Red Hat Enterprise Linux (2.6.32-71.el6.i686)
              root (hd0,1)
              kernel /vmlinuz-2.6.32-71.el6.i686 ro root=UUID=0d96a842-0806-42fb-84af-2ae0676fd40d rd_NO_LUKS rd_NO_LVM rd_NO_MD rd_NO_DM LANG=en_US.UTF-8 SYSFONT=latarcyrheb-sun16 KEYBOARDTYPE=pc KEYTABLE=us crashkernel=auto rhgb quiet
              initrd /initramfs-2.6.32-71.el6.i686.img
        title Windows 7
              rootnoverify (hd0,0)
              chainloader +1


                   Every line which starts with ‘#’ is a comment. The comment lines don’t affect the working of the GRUB file. First line suggests that this file is created by anaconda, which is the RHEL 6 installation program.

        The actual commands in this file are:
        ·         default=0 : this means that GRUB will boot RHEL 5 by default.

        ·         Timeout=5 : this means, before GRUB automatically boots the default Operating System it will wait for 5 seconds.

        ·         splashimage : directive locates the graphical GRUB menu screen which is located at (hd0,1)/grub/splash.xpm.gz

        ·         hiddenmenu: directive means that the GRUB options are hidden, with the message shown below:
        Booting Red Hat Enterprise Linux Server (2.6.32-71.el6.i686)

        This GRUB configuration file can be used to diagnose and recover GRUB problems.